Render the Note Form
이제 컨테이너가 componentDidMount에 메모를 적재 했으므로 편집을 위해 사용할 양식을 렌더링 해 보겠습니다.

src/containers/Notes.js 파일에 아래 내용과 같이 메소드를 추가하고 render 메소드를 변경합니다.
validateForm() {
return this.state.content.length > 0;
}
formatFilename(str) {
return str.replace(/^\w+-/, "");
}
handleChange = event => {
this.setState({
[event.target.id]: event.target.value
});
}
handleFileChange = event => {
this.file = event.target.files[0];
}
handleSubmit = async event => {
event.preventDefault();
if (this.file && this.file.size > config.MAX_ATTACHMENT_SIZE) {
alert(`Please pick a file smaller than ${config.MAX_ATTACHMENT_SIZE/1000000} MB.`);
return;
}
this.setState({ isLoading: true });
}
handleDelete = async event => {
event.preventDefault();
const confirmed = window.confirm(
"Are you sure you want to delete this note?"
);
if (!confirmed) {
return;
}
this.setState({ isDeleting: true });
}
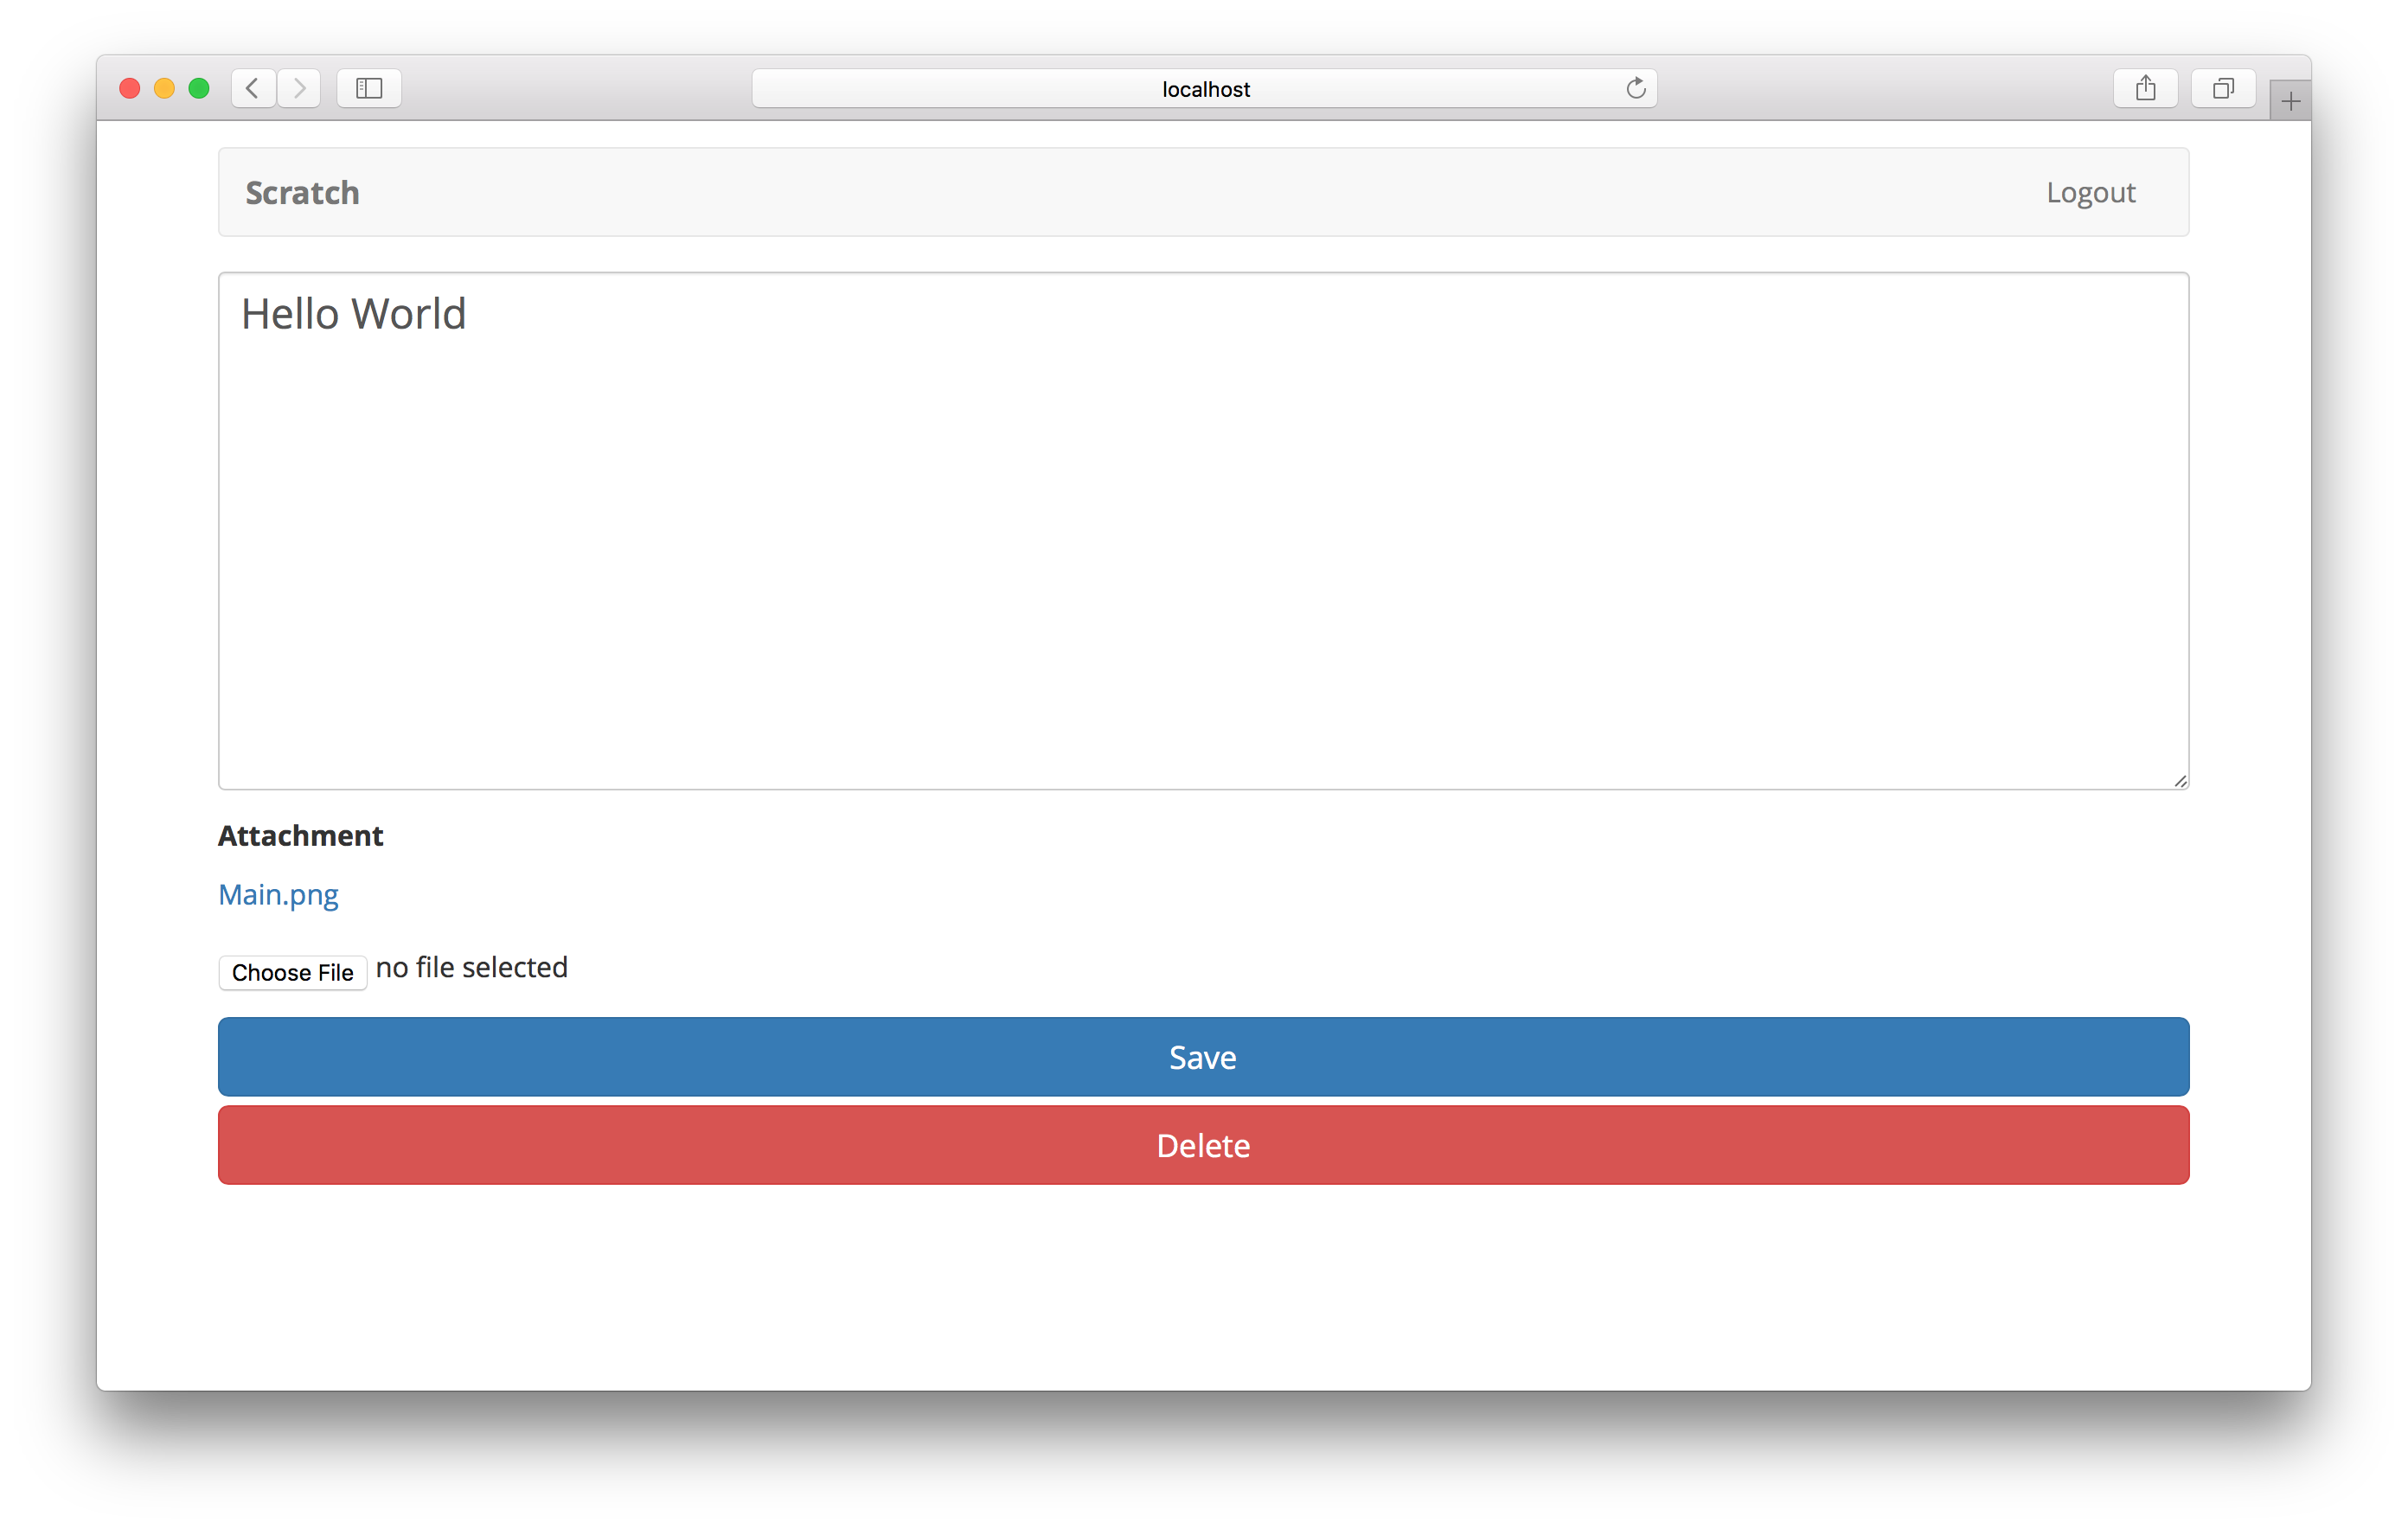
render() {
return (
<div className="Notes">
{this.state.note &&
<form onSubmit={this.handleSubmit}>
<FormGroup controlId="content">
<FormControl
onChange={this.handleChange}
value={this.state.content}
componentClass="textarea"
/>
</FormGroup>
{this.state.note.attachment &&
<FormGroup>
<ControlLabel>Attachment</ControlLabel>
<FormControl.Static>
<a
target="_blank"
rel="noopener noreferrer"
href={this.state.attachmentURL}
>
{this.formatFilename(this.state.note.attachment)}
</a>
</FormControl.Static>
</FormGroup>}
<FormGroup controlId="file">
{!this.state.note.attachment &&
<ControlLabel>Attachment</ControlLabel>}
<FormControl onChange={this.handleFileChange} type="file" />
</FormGroup>
<LoaderButton
block
bsStyle="primary"
bsSize="large"
disabled={!this.validateForm()}
type="submit"
isLoading={this.state.isLoading}
text="Save"
loadingText="Saving…"
/>
<LoaderButton
block
bsStyle="danger"
bsSize="large"
isLoading={this.state.isDeleting}
onClick={this.handleDelete}
text="Delete"
loadingText="Deleting…"
/>
</form>}
</div>
);
}
여기서 다음 몇 가지를 처리하고 있습니다.
-
this.state.note가 사용 가능한 경우에만 양식을 렌더링합니다. -
양식 안에
this.state.note.attachment를 사용하여 첨부 파일을 표시하는 부분에 대해 조건부로 렌더링합니다. -
업로드하는 동안 파일 이름에 추가한 타임스탬프를 제거하기 위해
formatFilename을 사용하여 첨부 파일 URL의 형식을 지정합니다. -
삭제 버튼을 추가하여 사용자가 메모를 삭제할 수 있도록 했습니다. 저장 버튼과 마찬가지로 요청이 진행 중임을 알리는 플래그가 필요합니다. 이것을
isDeleting이라고 지정합니다. -
NewNote컴포넌트에서했던 것과 똑같이 파일 입력으로 첨부 파일을 처리합니다. -
삭제 버튼은 브라우저의
confirm대화 상자를 사용하여 메모를 삭제할 것인지를 사용자에게 확인합니다.
이 코드를 완성하기 위해 lisLoading과 isDeleting을 state에 추가합니다.
그럼 constructor의 state는 다음 처럼 설정되어 있어야 합니다.
this.state = {
  isLoading: null,
  isDeleting: null,
  note: null,
  content: "",
  attachmentURL: null
};
src/containers/Notes.css에 다음을 추가해서 약간의 스타일을 반영하겠습니다.
.Notes form {
  padding-bottom: 15px;
}

.Notes form textarea {
  height: 300px;
  font-size: 24px;
}
또한 헤더에 다음을 추가하여 여기에서 사용중인 React-Bootstrap 구성 요소와 스타일인 LoaderButton 그리고 config를 포함 시키십시오.
import { FormGroup, FormControl, ControlLabel } from "react-bootstrap";
import LoaderButton from "../components/LoaderButton";
import config from "../config";
import "./Notes.css";
이제 됐습니다. 브라우저로 전환하면 노트가 로딩된 화면이 보여야합니다.
다음으로, 변경 사항을 노트에 저장하는 방법을 살펴 보겠습니다.
For help and discussion
Comments on this chapter